
Every bagger owner hits the same wall eventually. The stock radio sounds fine in the garage, then you get on the highway at 70 and the music disappears under wind, pipes and road noise. Turning it up just makes it harsher. That’s not a volume problem. It’s a speaker and power problem, and it’s very fixable.
I’ve done a lot of bagger installs, and the bikes that sound great at speed all follow the same basic recipe: efficient speakers in the right spots, a compact amp with real power behind them, and wiring that doesn’t starve the bike’s charging system. Here’s how to plan a bagger audio upgrade that actually holds up at highway speed.
Why Motorcycle Audio Is a Different Animal
A car gives you a sealed cabin, doors that act like speaker enclosures and a big alternator. A bike gives you none of that. You’re sitting in open air, the speakers fire into the wind, and every watt comes from a charging system that was never designed for a big stereo.
That changes what you shop for:
- Efficiency matters more than bass extension. You won’t get deep bass from a fairing. You want speakers that turn a little power into a lot of output in the midrange, where vocals and guitars live.
- Size and depth are tight. Fairings and saddlebag lids have very little mounting depth, so slim speakers and compact amps are the norm.
- The weather is real. Rain, wash days and humidity will find any weak point. Mount carefully and seal connections.
- Current draw has to be planned. A bike has far less electrical headroom than a car, so power choices need some restraint.
Where the Speakers Go
Most bagger systems are built around four locations. You don’t need all of them on day one, but it helps to plan the end goal so you buy the right amp the first time.
| Location | Typical size | What it does |
|---|---|---|
| Front fairing | 6.5″ on most newer batwing and shark-nose fairings (older bikes are often 5.25″) | Your main speakers. Closest to your ears, most important upgrade. |
| Fairing lowers | 6.5″ with lower speaker pods | Adds midbass and fills the area around your legs. |
| Saddlebag lids | 6×9″ or 8″ with aftermarket speaker lids | Fills in sound for the passenger and adds output behind you. |
| Tour pack | Varies by pod | Passenger speakers on bikes with a trunk. |
Always confirm what your specific year and model takes before ordering. Fitment changed across model years, and aftermarket fairings and lids open up bigger options. If you’re not sure what’s in there now, pull the inner fairing and measure. It’s a 20-minute job on most bikes.
Picking Bagger Speakers
Coaxials with compression drivers
For most riders, a slim coaxial with a compression driver is the sweet spot. The compression driver handles the highs with a lot more authority than a soft dome tweeter, so you can still hear cymbals and detail over wind noise. It’s also a direct swap in most stock locations.
Our BGS-CX694SL 6×9″ Slim Coaxial with 1″ Compression Driver is built for exactly this job in saddlebag lids, and the BGS-CX84SL 8″ Slim Coaxial with 1″ Compression Driver works in 8″ lids and fairings that have been opened up for bigger speakers. The slim design is the point. Lid and fairing depth is usually the first thing that kills a speaker choice.
Pro-hybrid mids with a horn
If you want the bike to be heard from a block away, a pro-hybrid speaker steps it up. These combine a pro audio style midrange cone with a horn-loaded compression driver in one unit, so you get serious midrange output and highs that cut through at freeway speed. The BGX 6″ Pro-Hybrid Midrange with 2″ Horn is the one I’d look at for a fairing build that’s all about volume.
Pro-hybrids want real amplifier power. Running them off a stock radio wastes most of what they can do.
Choosing a Bagger Amp
The stock radio puts out a handful of watts per channel. That’s enough for parking lot listening and not much else. A dedicated bagger amp is what lets the speakers play loud and clean without the radio clipping.
Bagger amps are built small on purpose so they fit under the seat, in the fairing or inside a saddlebag. Here’s how I’d match amps to builds:
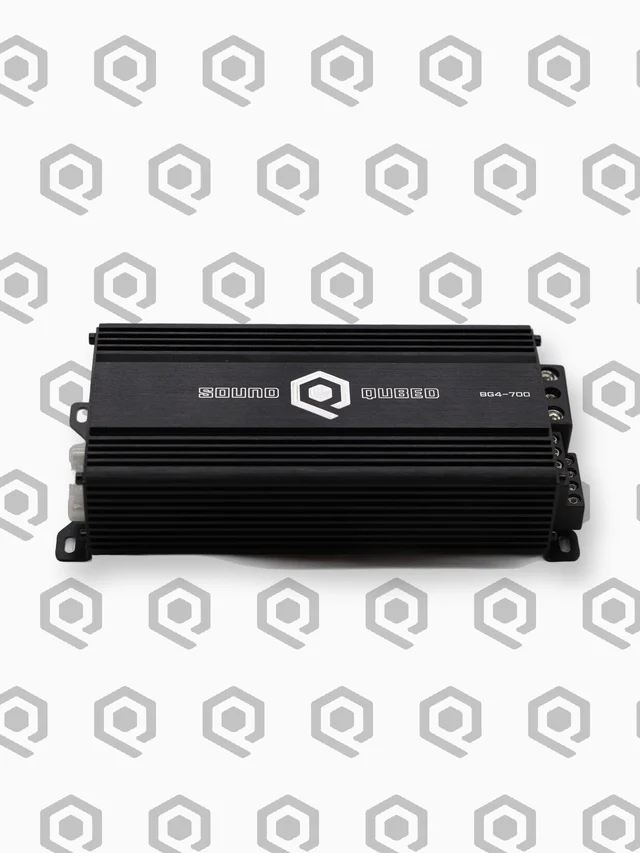
- Fairing speakers only, or fairing plus lowers on a modest budget: the BG4-700 4-Channel Bagger Amplifier (700W, ultra-compact). Four channels covers a pair of fairing speakers and a pair of lowers or lids.
- Full four-location builds or pro-hybrid speakers: the BG4-1400 4-Channel Bagger Amplifier (1,400W, compact). More headroom means less strain and cleaner output when you’re cruising with it turned up.
- Bikes with a sub in the tour pack or saddlebag: add the BG1-750 750W bagger monoblock to run the sub on its own channel.
Some bigger builds run two 4-channel amps, one for the front and one for the rear. That’s a great setup, but plan your electrical system first (more on that below).
Match power to the speakers, not the box
Look at your speakers’ RMS rating and your amp’s RMS output at the actual impedance you’ll run. Peak numbers don’t tell you much. If this is new territory, our guide on RMS vs peak power covers it, and the Ohm Load Calculator will show you the final load when you wire multiple speakers to one channel.
Getting Signal From the Radio
Most riders keep the factory infotainment unit because it’s tied into the bike’s controls. That’s fine. You just need to get a clean signal from it to the amp.
The common approaches:
- Speaker-level input: if your amp accepts it, you tap the radio’s speaker outputs directly into the amp. Simple and clean.
- Line output converter: converts the speaker-level signal to RCA level for amps that only take low-level input. Our write-up on line output converters walks through it.
- Plug-and-play harnesses: bike-specific harnesses save cutting factory wires and make the install reversible. Worth the money on a newer bike.
Once it’s wired, set the gains properly. A bagger gets played loud for hours, and clipping is what kills speakers. The process in how to set amp gain works the same for mids and coaxials as it does for subs.
Power and Wiring: Don’t Skip This Part
This is where bagger installs go wrong. A bike’s charging system is small compared to a car’s, and a stereo that pulls more than the stator can supply will slowly drain the battery while you ride.
- Fuse at the battery. Every power wire gets a fuse within a few inches of the battery. No exceptions.
- Use the right gauge. Runs on a bike are short, but undersized wire still causes voltage drop and heat. Follow the amp’s recommendation.
- Solid grounds. Ground to the battery negative or a clean frame point. Bad grounds cause most of the noise and cutouts I see.
- Use a relay or switched trigger. The amp should only turn on with the key. An amp left on overnight is a dead battery in the morning.
- Seal everything. Heat shrink over crimps, dielectric grease on connectors, and route wires away from the exhaust.
- Watch the voltmeter. If voltage sags while you’re playing it loud at idle, you’ve hit the limit of your charging system.
For bigger multi-amp builds, many owners upgrade the battery and stator. Talk to a shop that does bagger audio regularly before you go there.
Small Tweaks That Make a Big Difference
- Seal the fairing speaker. Foam gaskets keep the front and back waves of the speaker from canceling out. Easy midbass gain.
- Sound deadening inside the fairing and lids. Cuts rattles and makes the plastic act less like a drum. Same idea as our door deadening guide, just on a smaller scale.
- Use the radio’s EQ and speed-sensitive volume sparingly. A little bass boost goes a long way on a bike, and too much just makes the amp work harder for nothing.
- Aim the highs. If your speaker pods or grilles allow it, point the horns or tweeters toward the rider.
A Simple Upgrade Path
You don’t have to do it all at once. This is the order I usually recommend:
- Swap the fairing speakers for efficient slim coaxials or pro-hybrids.
- Add a 4-channel bagger amp to power them properly.
- Add lowers or saddlebag lid speakers on the open channels.
- Add a sub, a second amp or tour pack speakers if you want more, after confirming your charging system can keep up.
Step two is the big one. New speakers alone help, but new speakers with real power is where the bike starts sounding right at speed.
FAQ
Do I need an amp for bagger speakers?
For quiet cruising, no. For being heard clearly at highway speed, yes. The stock radio runs out of clean power long before efficient aftermarket speakers reach their potential.
Will an amp drain my motorcycle battery?
Not if it’s wired with a switched trigger and sized for your charging system. Problems come from oversized systems or amps that stay on with the key off.
Can I keep my factory infotainment system?
Yes. Most bagger upgrades keep the factory unit and feed the amp through speaker-level inputs, a line output converter or a bike-specific harness.
What size speakers fit my fairing?
Many newer batwing and shark-nose fairings take 6.5″ speakers, while older bikes often use 5.25″. Aftermarket fairings and adapters change that, so measure or check your model before ordering.
Coaxial or pro-hybrid: which should I pick?
Slim coaxials with compression drivers are the best all-around choice and easy to fit. Pro-hybrids are for riders who want maximum volume and are willing to give them serious amp power.
Ready to Build Your Bagger System?
Browse the full lineup of bagger speakers and amps in the SoundQubed shop and buy direct at soundqubed.com. If you’d rather have a pro handle the install, use our Dealer Locator to find a SoundQubed installer near you.